Is this even working? That’s the biggest question that people have, when it comes to paid ads.
Not everyone though. Some people are crazy, and they just run them and hope for the best.
They think “Well my sales are higher than my costs, so it should all be ok…”
Ignorance is bliss right?
More like a recipe for anxiety if you ask me! If you want to sleep easy at night, then you need to be tracking and measuring your results.
If you’ve been following this series from the start, then the good news is that you’ve already done some of the hard work and learned just how much you can afford to pay, to run a profitable ad for your business.
So now you have some ad performance ‘goal posts’ to aim for, it’s time to set up ad tracking so you can measure your results. That way, you’ll not only know if the ad is definitely working – but you can improve or scale from there.
Sounds good?
Alright lets dive in! In this chapter we’re going to walk you through a process that lets you know down to the dollar, how effective your ad is
- Is it losing money?
- Is it profitable?
This is how you find out…

 |
 |
|---|---|
 |
 |
 |
 |
 |
 |
Ad Tracking 101 AKA ‘How To Know If Your Ad Is Making Money’
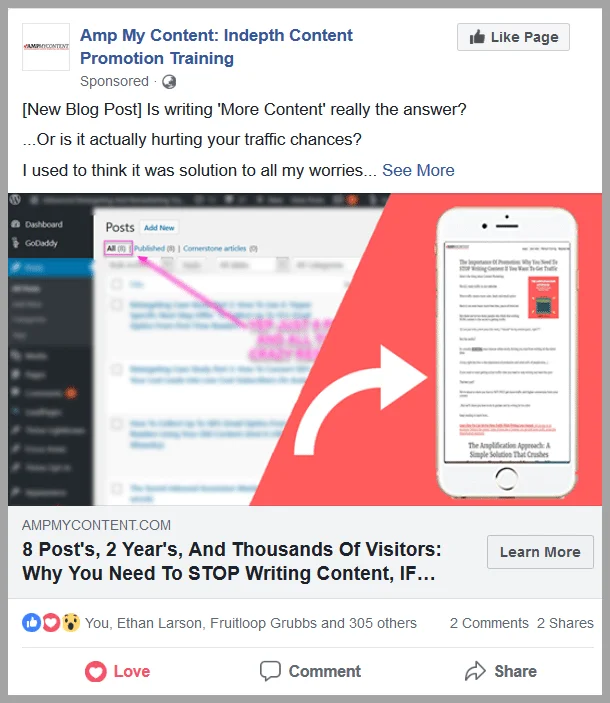
We recently wrote an article called Why You Need To STOP Writing Content, If You Want To Get Traffic
Its the backbone of our methodology
We believe that if you want to get results with your content marketing, then you need to promote, far more than you create
(Especially if you’re a small business)
And so we started promoting that article…
We ran some low cost ads to attract a brand new, cold audience
We did the math and found out that we could afford to spend up to $15 per lead
This gave us ‘goal posts’ to aim for
A max price we could afford to pay to get a new subscriber or customer, to our business
Its all good knowing how much you can pay…
…but we still needed to be able to track those results
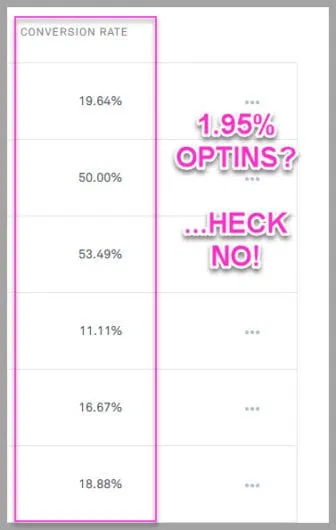
By setting up conversion tracking, we’re able to measure our ads performance:
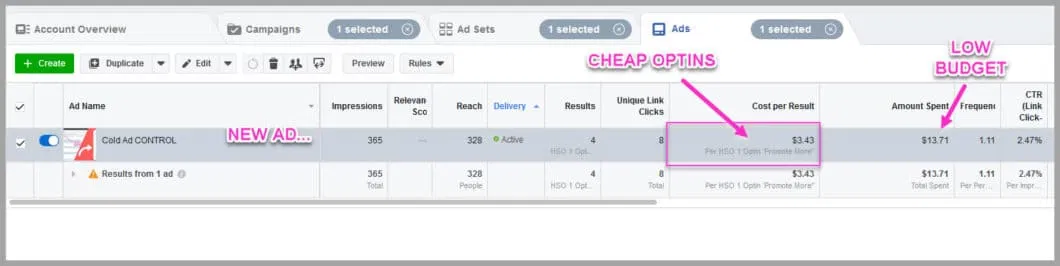
Pretty cool right?
We could spend up to $15, but are getting leads for just $4
Now bad
So now we could see how the ads were performing, and improve as needed
Not only that?
We could even track those results to sales further down the line…
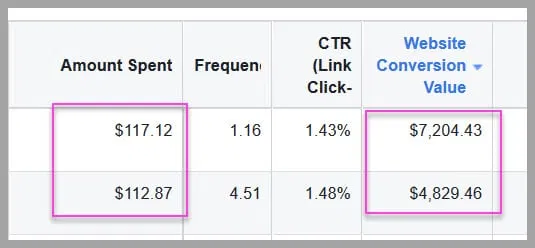
With just a few clicks, we can see dollars in, and dollars out
ROI right there on the screen…
How’s that for peace of mind!
The best part?
You can do this exact same thing for your business… even if you just starting out, or have never tracked a campaign before
The 3-Simple Steps To Tracking (And Measuring) Your Ad Campaigns
Just like the other chapters, we’ve broken this down so its nice and easy
In fact?
The whole set up takes about ten minutes to do…
Step #1: Set up tracking for every page of your website
Step #2: Track conversions with a ‘success’ page
Step #3: Set up your ads dashboard to see those results
Easy right?
Let me break it all down for you
This way you can see how this chapter ties in with the whole process…
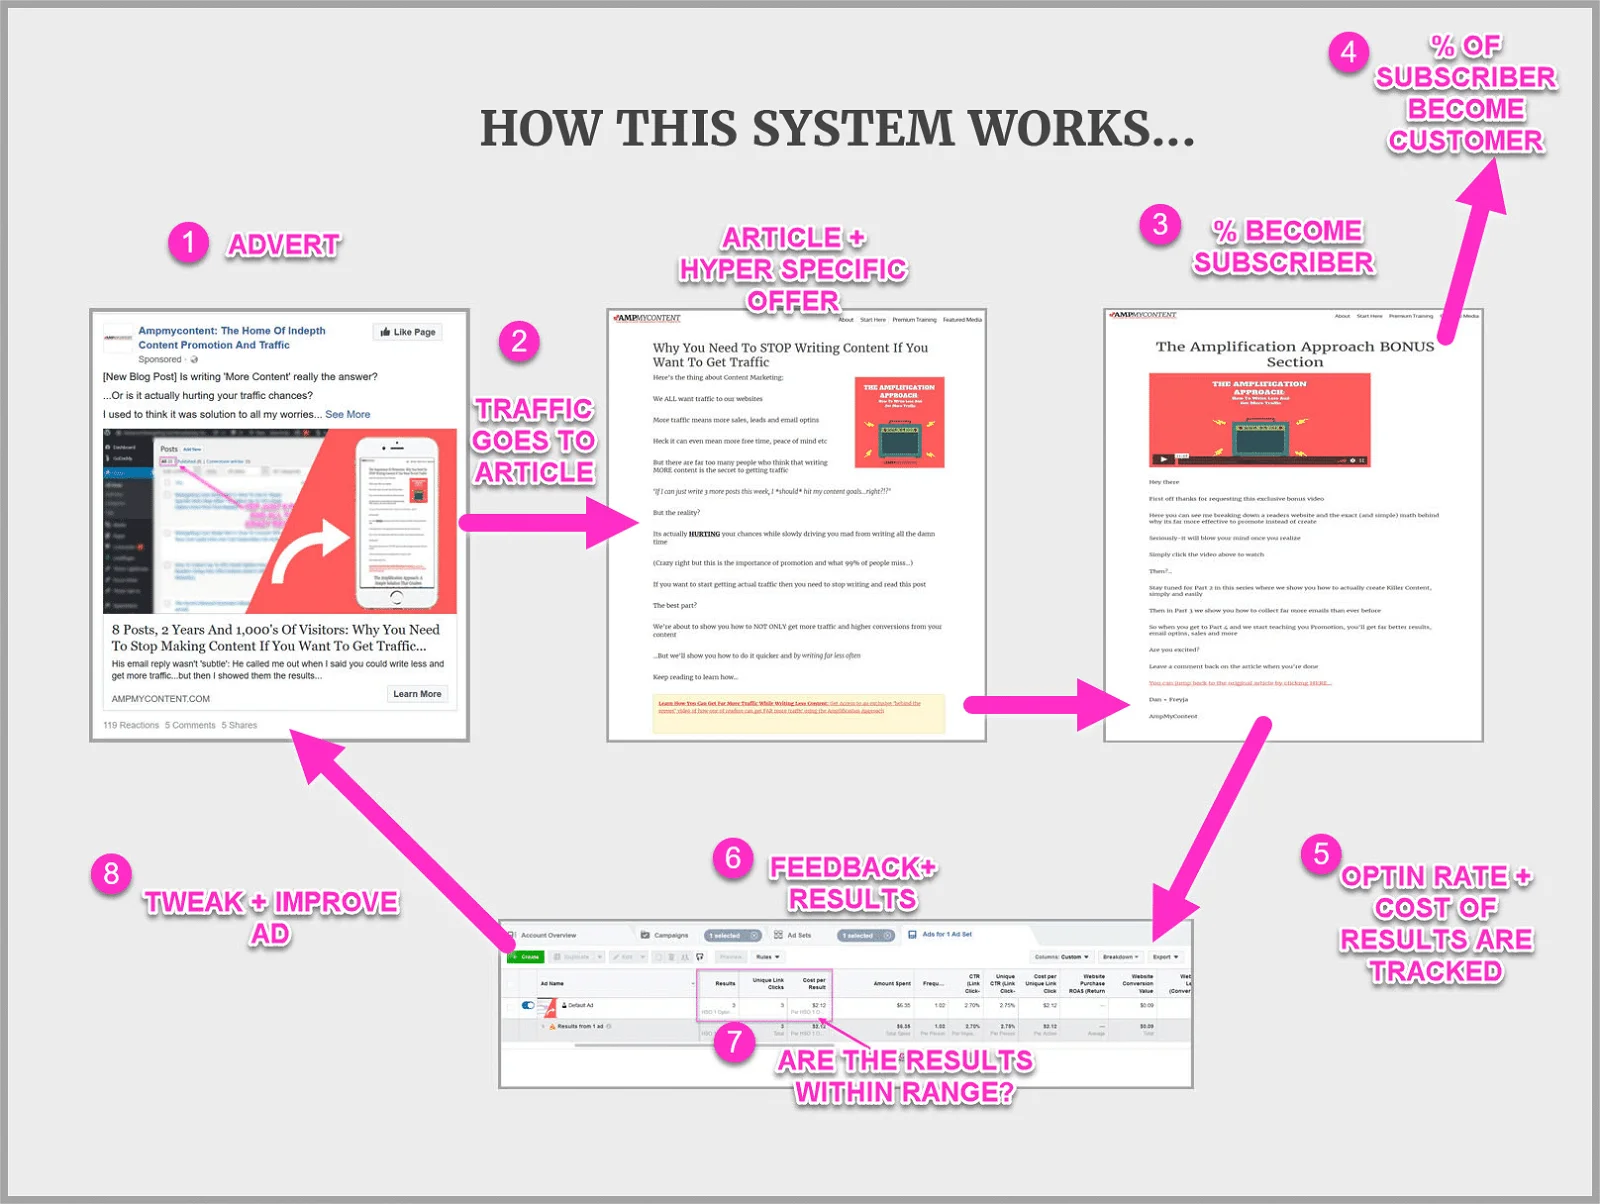
So a quick recap:
You’re running cold ads to drive traffic to a piece of content
In that content there is a Hyper Specific ‘Next Step’ Offer (A lead magnet on overdrive)
If the reader opts in and gives their email, they are then taken to a ‘success page’ where they can get their bonus
On this success page is a tracking pixel, that records this result
The pixel then provides feedback to Facebook, so they know how effective the ad is, how many leads are captured, and how much each lead cost you
This then gives you data to both know that:
- Yes the ad is working, and
- Gives you a performance cost (So you can adjust and improve your ads)
Simple right?
In this chapter you’re going to set up that tracking and feedback loop
Step #1: Track Every Page
You’re going to start by tracking all the traffic to your website
How?
By installing the ‘Facebook Tracking pixel’
Its a line of code that allows you to track visitors who have clicked on your ad, and then converted on your article…

Don’t freak out because its real simple to set up
(On some websites you literally copy and paste it across)
Go ahead and click here to open up the Facebook Events manager page
(Opens in new tab)
The pixel creation page should look like this…
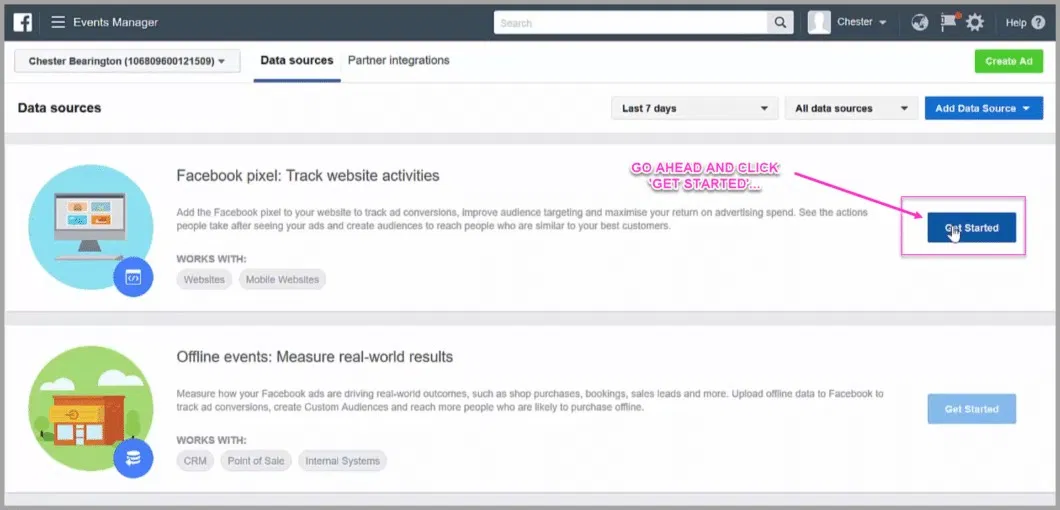
Click the ‘Get started’ button
This loads up a new pop up window…
![]()
(If you only have a Facebook personal account and not a business one, you can click to upgrade it for free- this gives you a few more advertising options etc)
Go ahead and click the blue ‘Create’ button
You’ll see a confirmation like this…
![]()
Boom! That’s the pixel created
(Told you it was easy eh?)
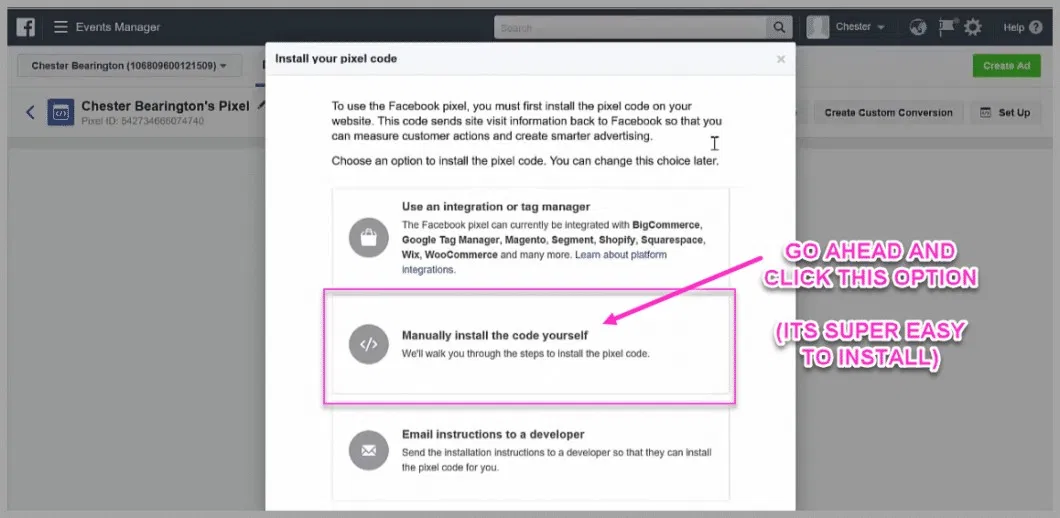
So now you need to install it on your website
Go ahead and click the ‘Manually install the code yourself’ option
(Don’t worry- its really easy to install and we’ll walk you through it all…)
A new pop up will appear
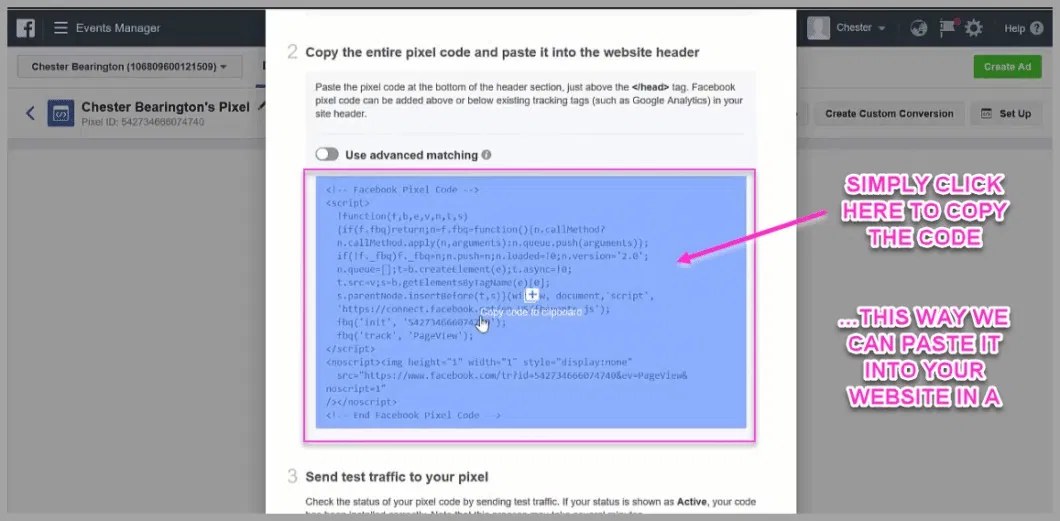
Scroll down until you see the section called ‘Copy the pixel code and paste into your header’
See the box of website code?
Click that code and it will copy it to your clipboard (The box will turn blue)
This will allow you to ‘copy and paste’ the code in just a second…
OK so now you have the code ready
Good job!
There are 2 ways to install your new pixel:
- Directly into you Web theme, or
- Into the Header File
Not everyone has each option, because it depends on your theme options
Let me run you though both of them just in case…
Option #1: Install The Code Into Your Website Theme
Go ahead and load up the backend of your website
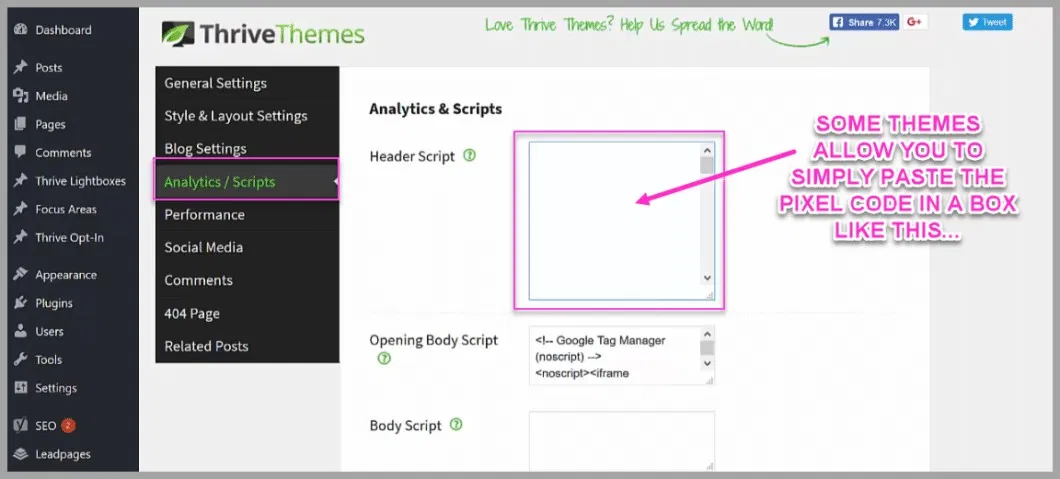
In this example I’m logging into a WordPress site, that’s using a Thrive Theme template
Thrive Themes have a special option where you can install your pixel code, simply by copying it into a box and hitting save
It looks like this…
Easy right?
OK so let me show you where to find it…
Scroll down your left hand menu and look for your theme dashboard
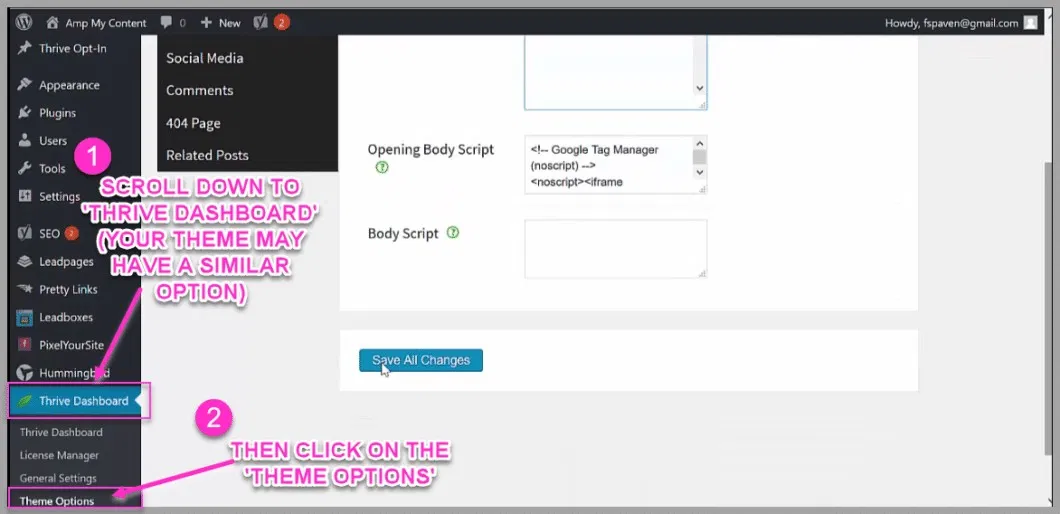
Your theme might have something similar
(It might be called ‘Theme Options’ etc)
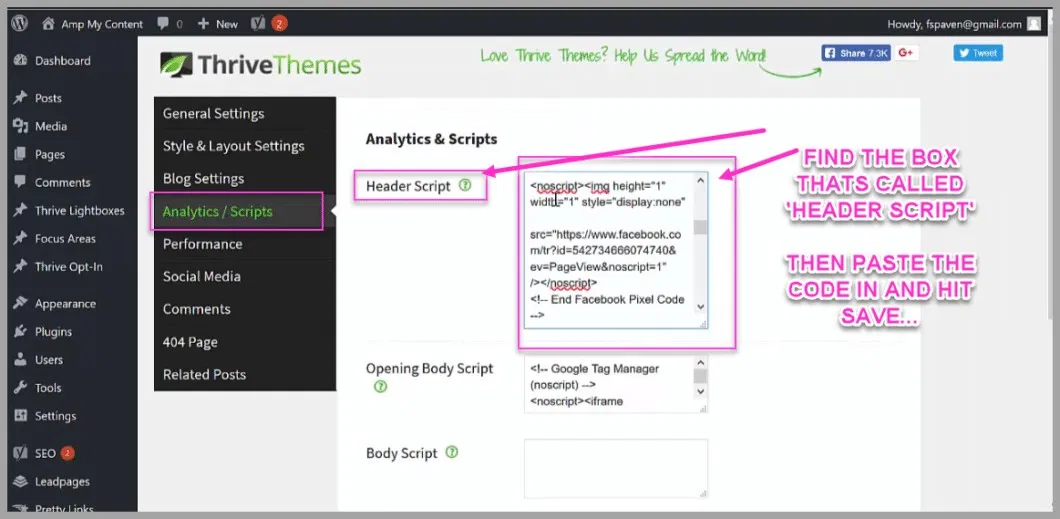
Your looking for an option usually called ‘Analytics’ or ‘Tracking Scripts’
Why?
Because the code for pixels and tracking scripts are usually copy + pasted to the same location…
Simply find the box that says ‘Header Script’ and then paste your pixel code into the box
Then all you need to do is hit save…
Easy right?
If you managed to install your pixel, then scroll down to step 2
If your website didn’t have this option?
No problem…
Option #2: Install The Code Into Your Website Header
This may seem a little scary, but its real easy
You’re going to copy and paste the code into the ‘header’ file of your website
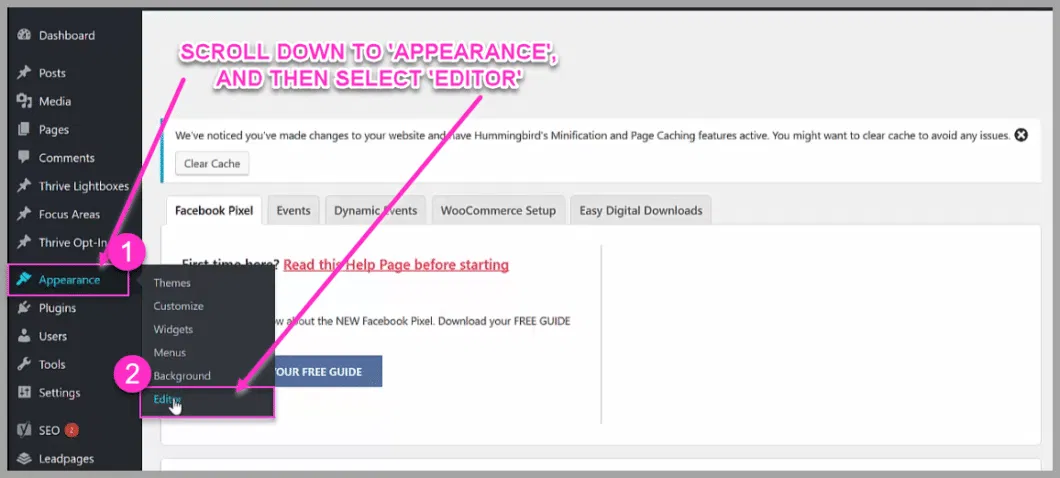
Head across to the left hand menu of your WordPress backend, and scroll down until you see ‘appearance’
Then click on ‘editor’…
This will load up the files that make your website
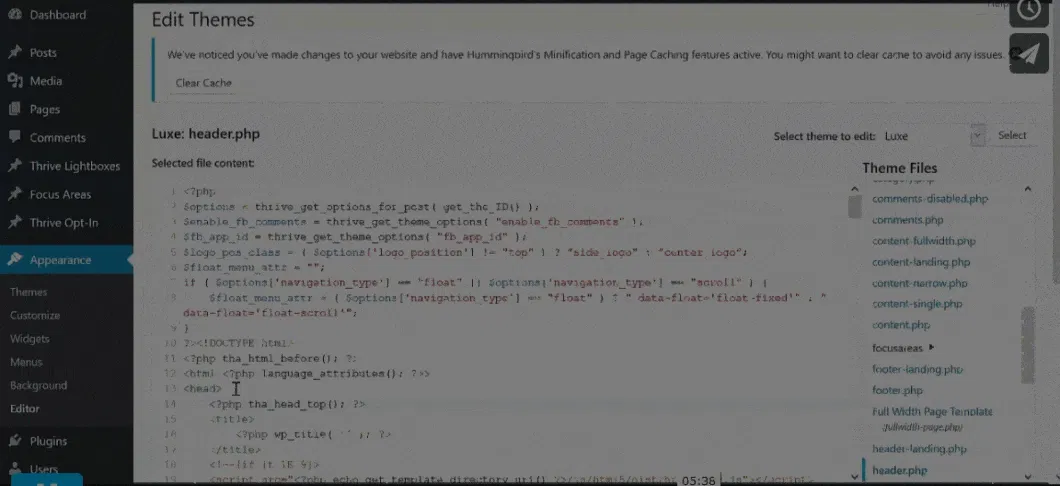
Scroll down the right hand menu, until you see a file called ‘header.php’
It looks like this…
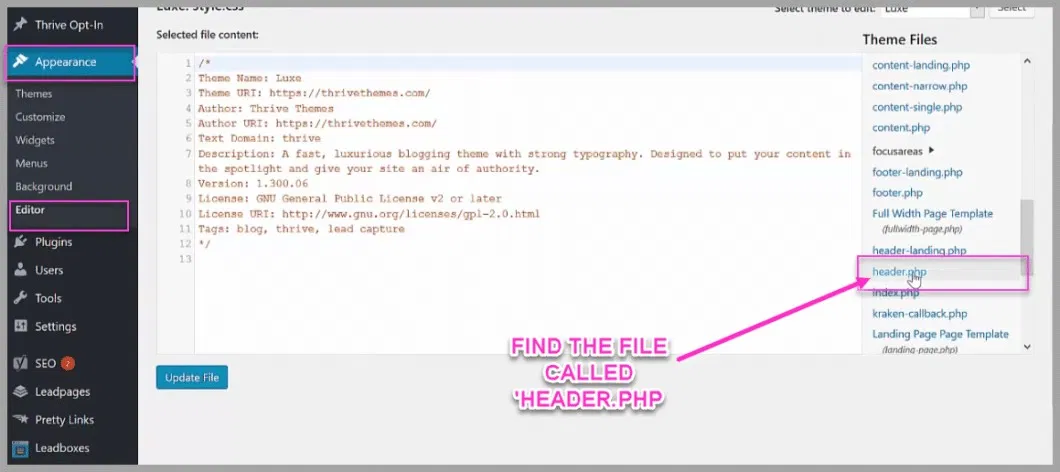
Click on the ‘header.php’ file
It will load up the code for the header section of your website
(That’s the bar at the top of your website which has your menu in it etc)
You’re going to enter your pixel code here
Why?
Because the header is on every page of your site, so its the perfect place to track every page visitor
The header file looks like this…
![]()
You need to paste your code in a specific place in this file
Find the section that says <head>
(It should be near the top of the page)
You need to paste your Facebook pixel just underneath this
This is the only part where you need to be careful
To make sure you don’t mess up any code, leave a blank space either side of your pixel code
How?
Simply click the line underneath where it says <head>
Then press ‘Enter’ on your keyboard 3 times…
Easy right?
Once you have that gap, find the middle line
Then simply right click + paste, to copy your code into the header
It should look like this…
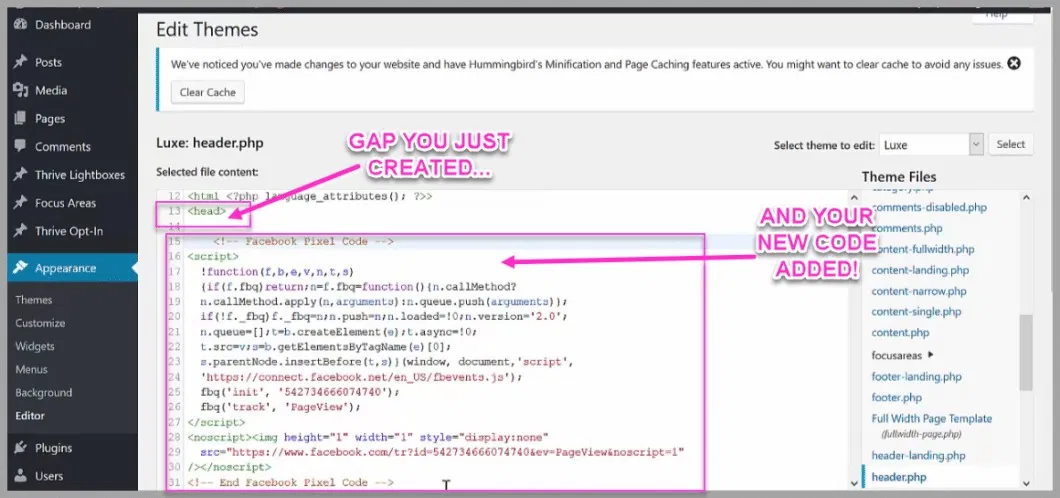
Easy right?
Leaving a gap either side just makes sure that the code all works correctly
So now the final step is just to save the change you just made
Scroll down the page until you see a blue button called ‘update file’…
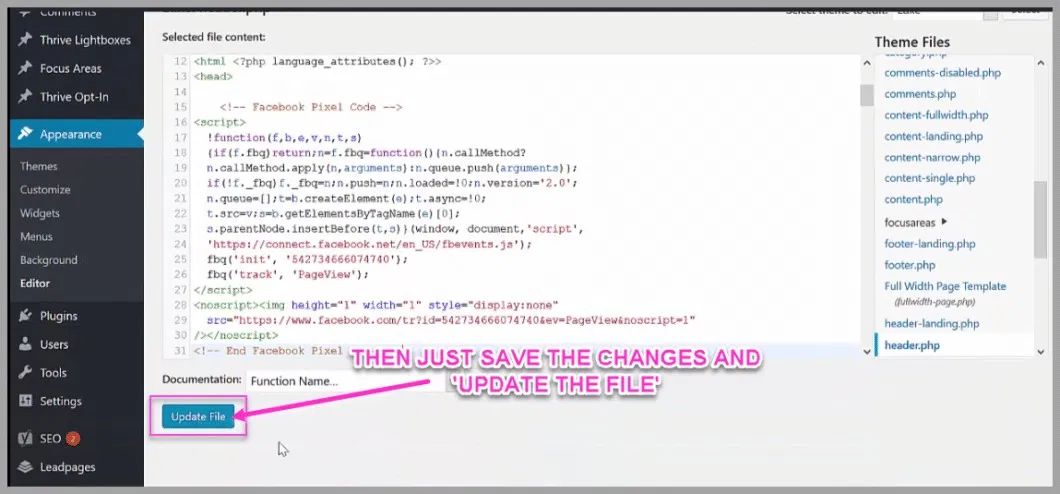
Click that and you’re pixel is added
Easy right?
Now to just check it works…
Verify That Your Pixel Is Working
Super quick step
You’re just going to check that your pixel is working correctly, and tracking your audience
How?
By using a free plugin called ‘Chrome Pixel Helper’
(You need Google Chrome to use it)
Click this link here to load up the pixel helper plugin in Chrome…
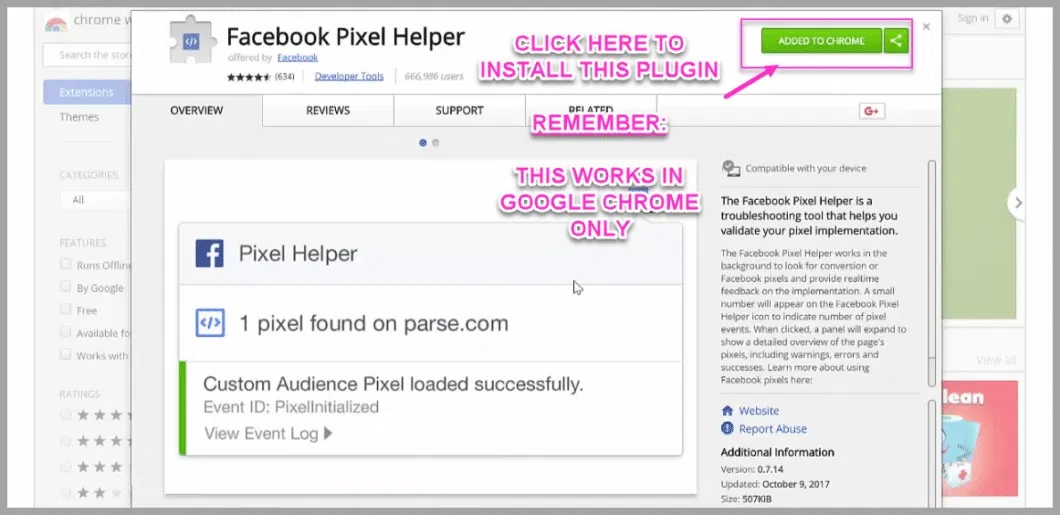
(If you don’t have Chrome, it’ll allow you to download it from that link also)
Go ahead and click the green button in the top right, to install the plugin
Easy right?
Once Chrome is loaded up, head across to your website…
See the grey box in the top of your Chrome screen?
That’s the pixel helper!
So how do you know if your pixel is working?
Well if the pixel helper stays grey, it means the pixel isn’t working…
(Usually because you didn’t leave a blank line above and below the code)
![]()
But if it turns blue with green arrows, then its all good!
Huzzah
So now your pixel is tracking your audience, lets walk you through how to track your conversions…
Step #2: Your Success Page (And HSO’s)
OK so now your pixel is all set up and tracking your audience
What you need to do now, is create a ‘custom conversion’ for Facebook to track
This way you can then measure those results
Its a simple process:
- Someone reads your article and opts in for your Hyper Specific Offer,
- Then they get forwarded to a unique success page for that article
- These article subscribers are the only people who ever see this page, and so your pixel tracks those visitors
Now I’m not going to show you how to create HSO’s in this chapter
The process takes a little time, and this chapter would be HUGE if we did that
You can read an indepth guide to creating HSO’s HERE
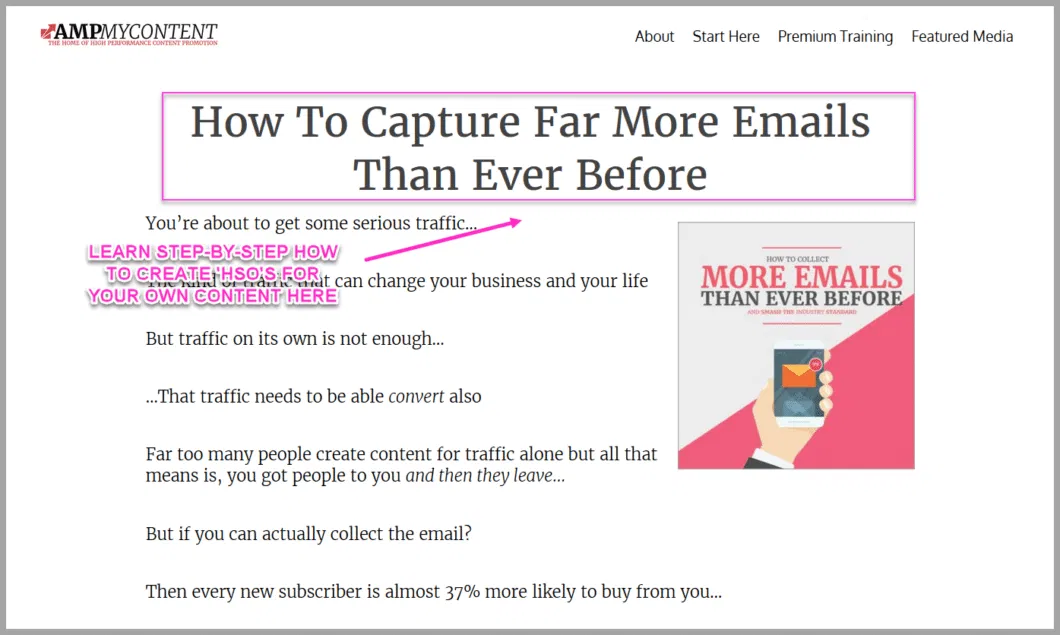
We said right back at chapter #1 that you need to be capturing those leads
This is how you can measure your ads performance AND see a return from your content promotion
If you don’t have an HSO already, then I highly recommend you create one
Why?
Because they have higher optin rates of any other lead capture method that I use…
(You can click on that link and open up that guide in a new tab)
To be clear
This conversion tracking can still work if you have some other lead capture method in place…
You just need to make sure that you have a unique success page that they get taken to after opting in
This way Facebook can track if someone visits that specific page
(Then it knows to treat them as being a ‘conversion’ for your new ads)
Its super important to have this, for the whole process to work
So lets make your success page…
Create Your Success Page
Log in to your backend menu in WordPress
In the left hand menu, click on ‘Add New Page’…
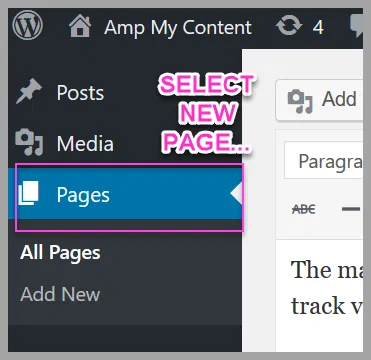
Go ahead and give the page a name, and then save it
This will then give you a unique URL for the page
(You’ll need this URL in a second for your custom conversion tracking…)
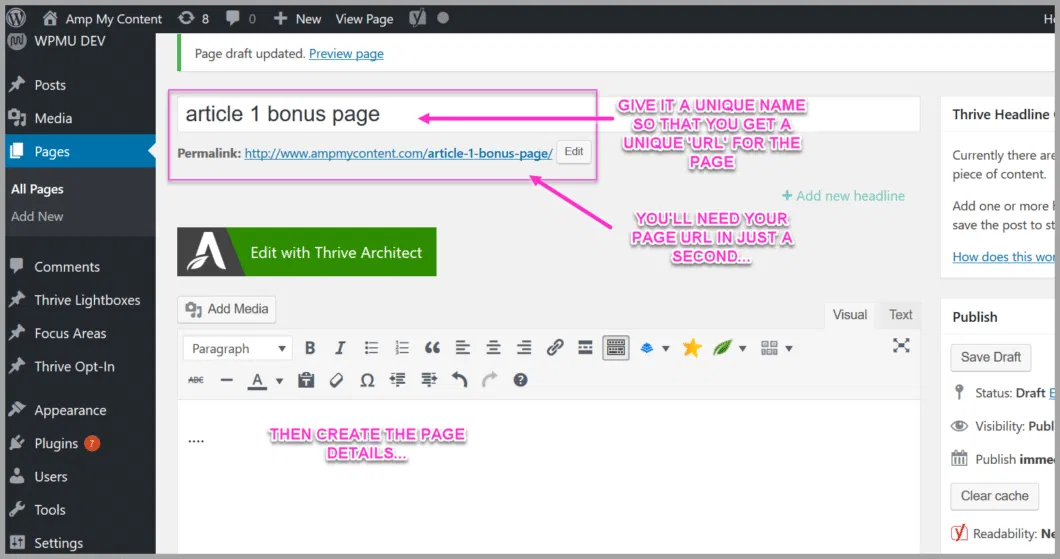
Now you just need to create the page
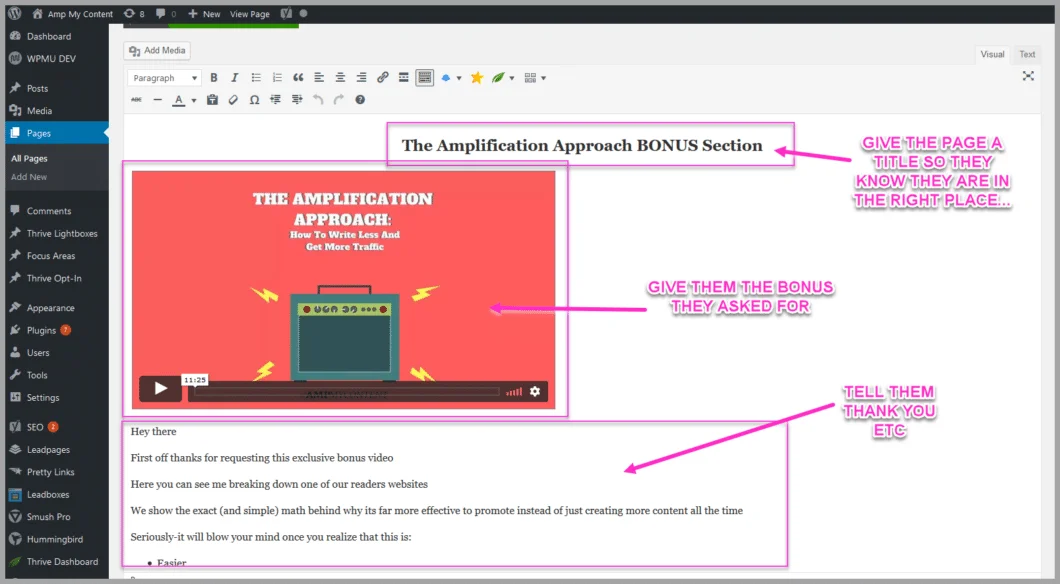
Go ahead and give the page:
- A headline so they understand they are in the right place
- Give them their bonus that they opted in for
- And say thanks…
That’s all you need!
Super easy right?
So now you need to track those success page visitors
And to do that?
You’re going to set up a ‘custom conversion’…
Step #3: Set Up Your Conversion Goals
So now you have your unique success page and its unique URL
Its probably something like:
“yourwebsite.com/article-X-success-page”…
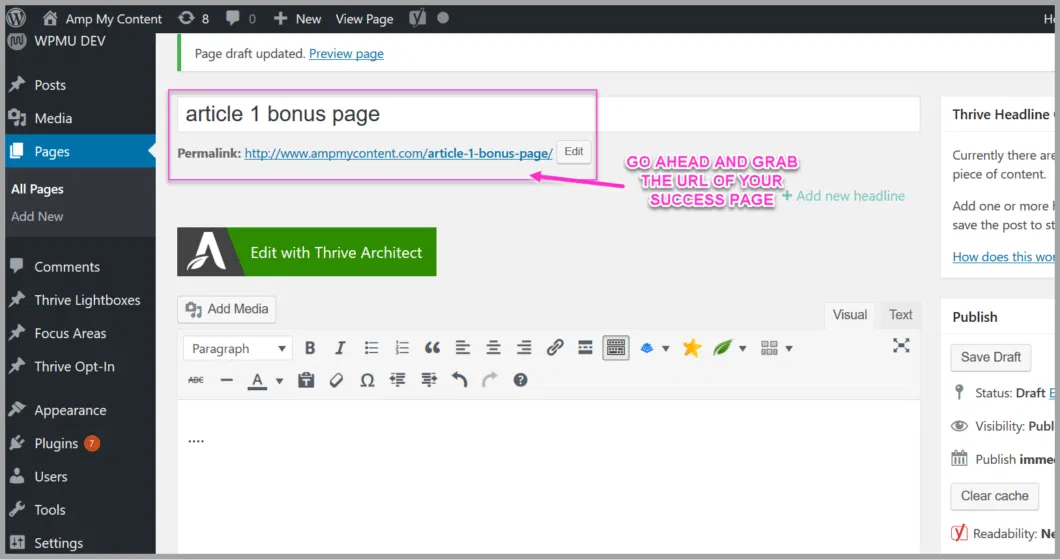
You need the URL of that page to set up conversion tracking
Go ahead and open up that success page, so you can copy and paste the URL in just a second
(Keep it open in a new tab)
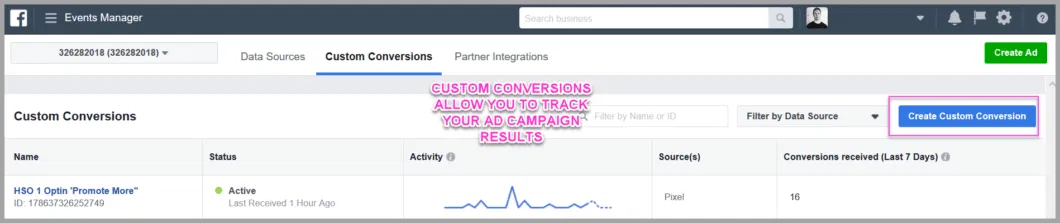
Then head across to your Facebook ads manager
Click this link here to open the ‘Custom Conversions’ section
It should look like this…
Click the blue button called ‘Create Custom Conversion’
A new pop up will appear on the page
It looks like this…
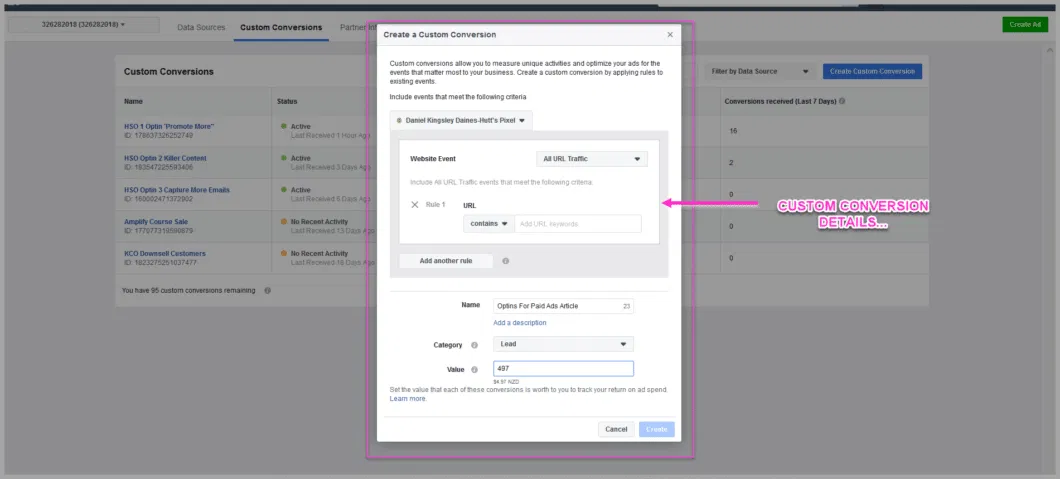
Start off by selecting the ‘event trigger’
This is simply telling Facebook what to track and how to classify it
Choose ‘All URL traffic’
Then scroll down to the next option and choose URL contains
Go ahead and paste the URL of your success page that you just created, in this box…
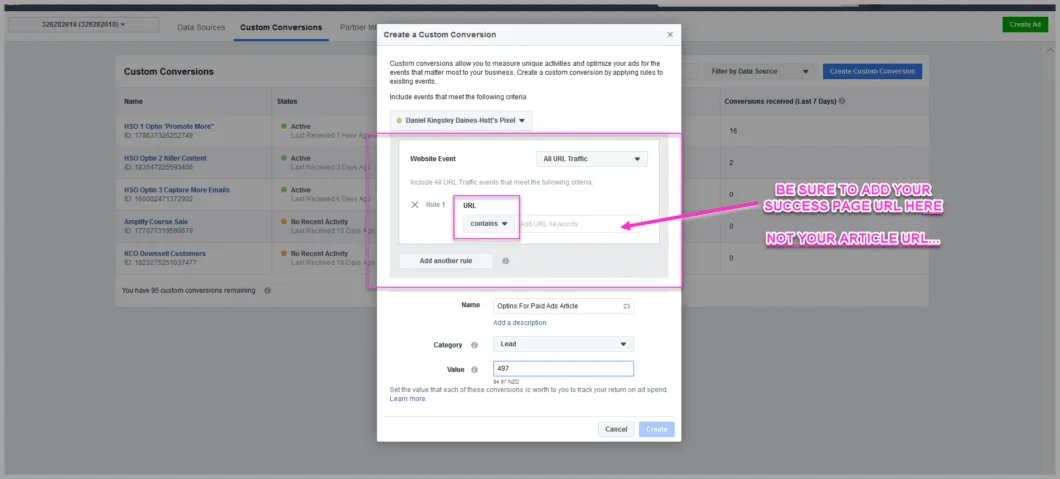
Super important:
Its vital that you use the success page URL, and NOT the URL of the article you want to promote
Why?
Because you only want to track those who convert and optin right?
That’s why you’re tracking the success page visitors, and not the article visitors…
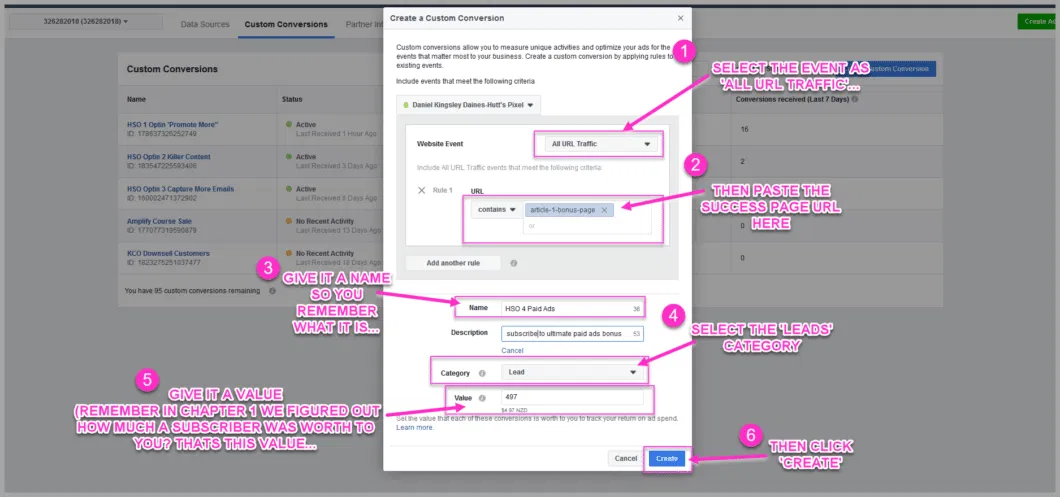
Go ahead and give it a name you’ll remember
Then select the ‘Lead’ category so that Facebook will understand that these conversions are new subscribers
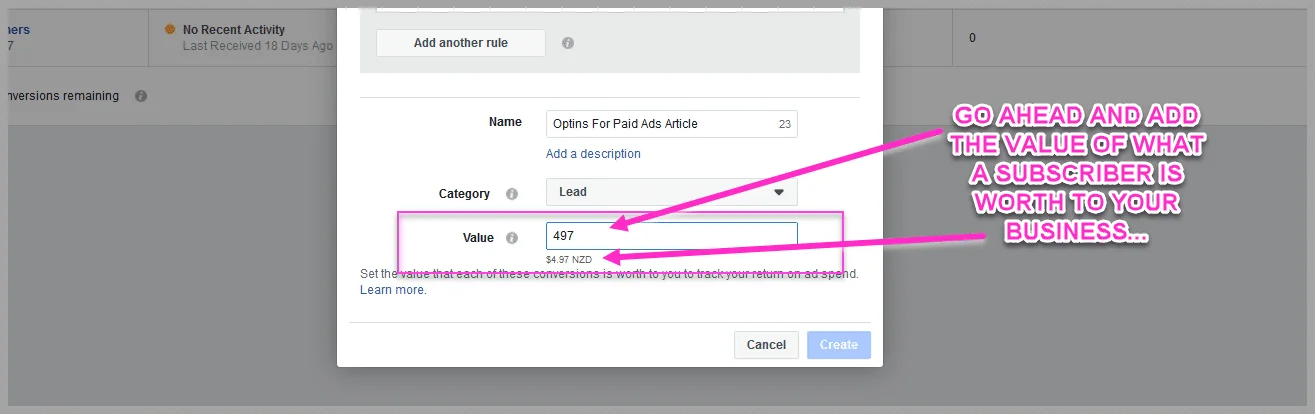
Finally, you can add a monetary value to this lead…
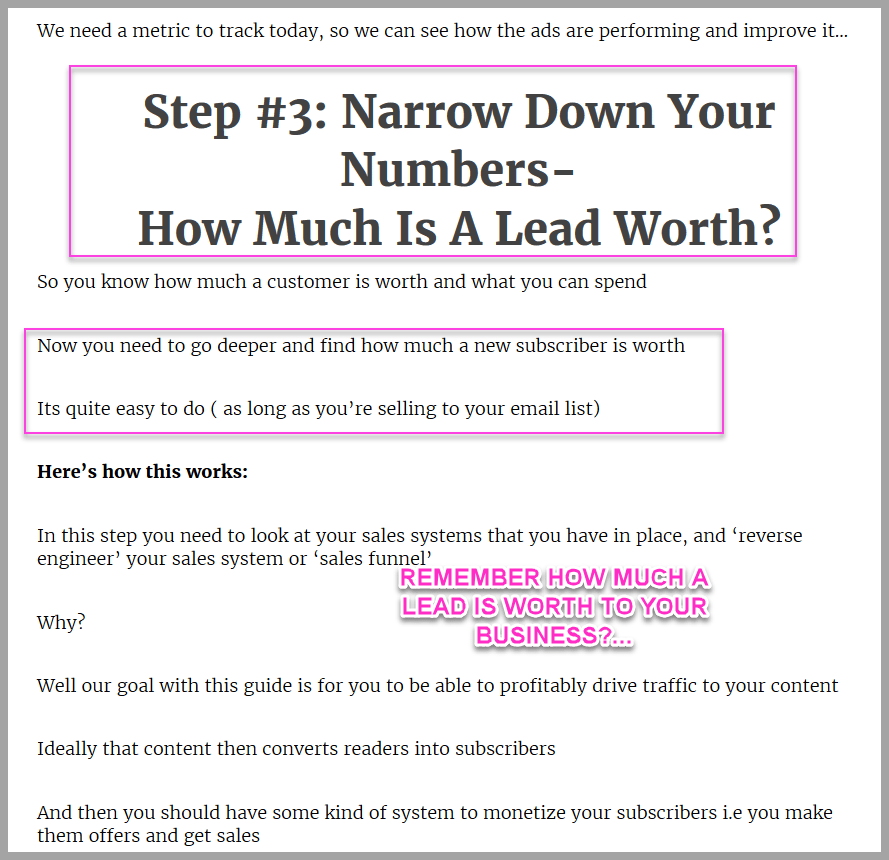
Remember back in chapter 2 where you figured out how much a lead was worth to your business?
By adding this value here, you can track your lead cost and value in your ads dashboard
So go ahead and enter the lead value that you figured out in chapter #2
SideNote:
You need to write out your value, without a decimal place
So if the lead is worth $4.97, then you write 497 instead
(If you’re not sure, you should be able to see the value appear under the box like so…)
Finally, click the blue ‘Create’ button to finish
Super easy right?
Now Facebook will be able to track the visitors to your success page AND tell you the value of those visitors
You can then use this to know the ROI of your ads, and see it right there on the screen
To do that?
You need to customize your ads dashboard…
Customize Your Ads Manager Dashboard
Super quick final task
Head across to your ads manager
We going to tweak your dashboard to and include your new conversion pixel as a result
That way, you’ll be able to see who’s opting, how much it costs and more…
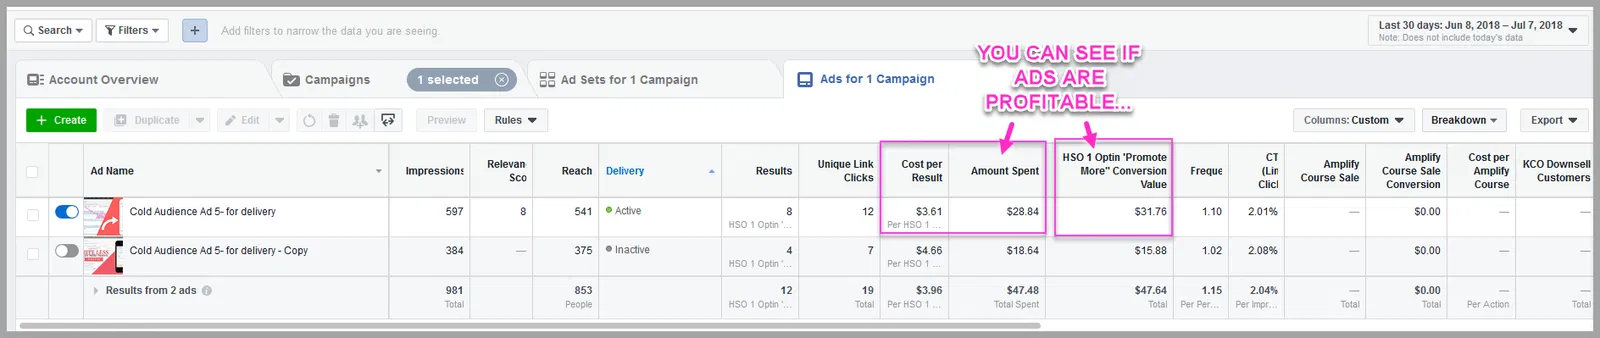
Here I can see on my dashboard, that my ads are profitable
You can customize your dashboard however you like
I recommend adding:
- The custom conversion itself
- The cost per custom conversion
- The total value of those conversions
Lets show you how to customize that dashboard
Head across to your Ads Manager by clicking HERE or follow the menu options below…
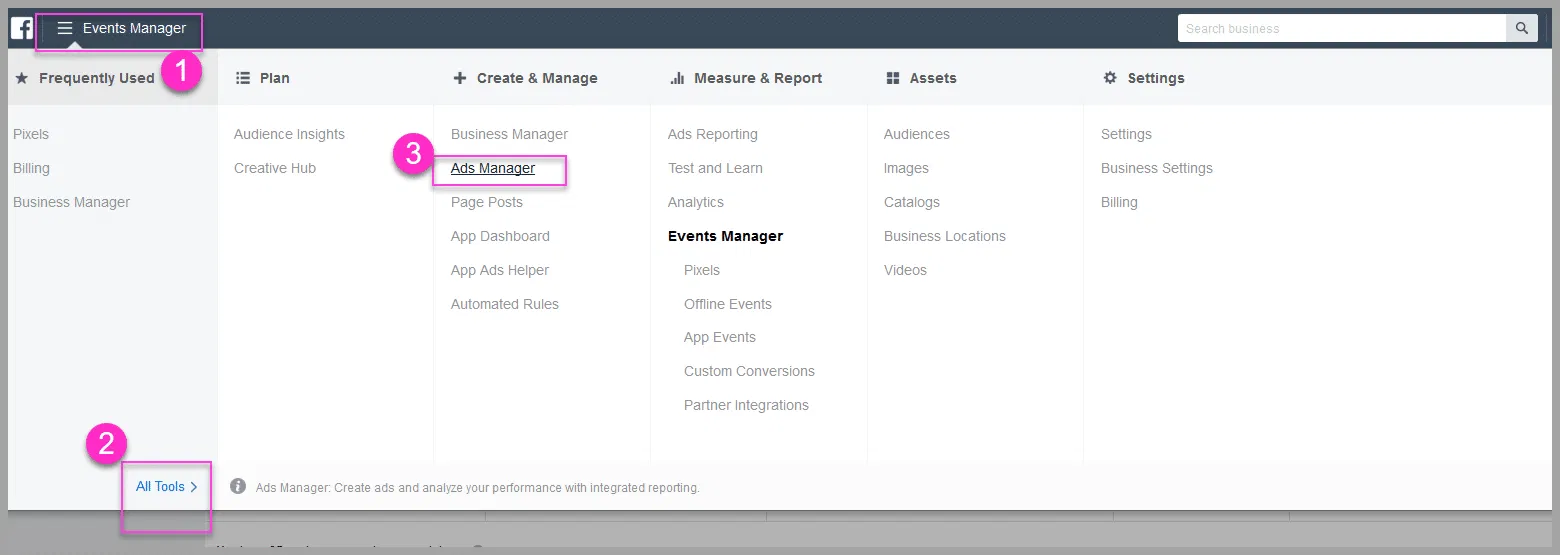
In your ads manager you should see your current adverts
On the right hand side you’ll see an option called ‘columns’
Click that and a drop down menu will appear…
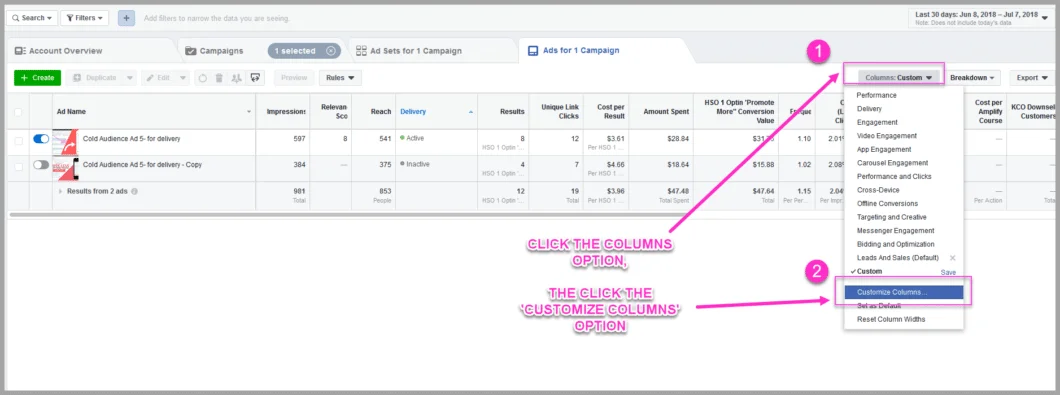
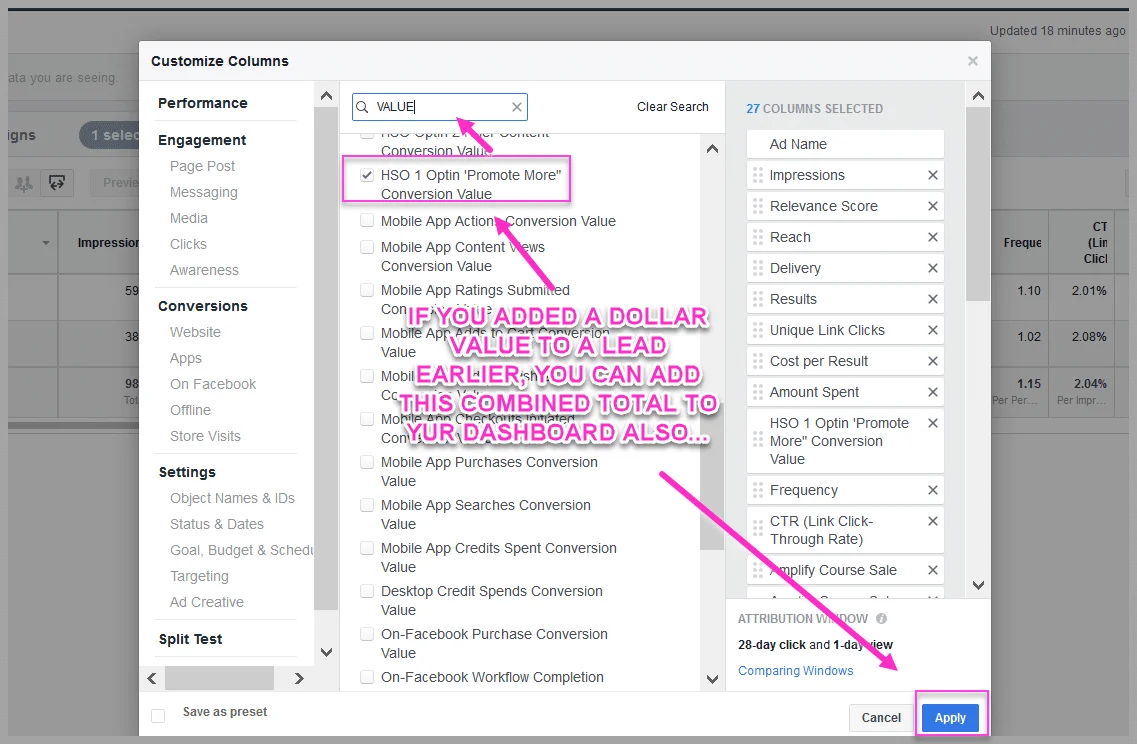
Click the ‘Customize Columns’ option
A new pop up will appear
You can select a whole heap of options here
In the search box at the top, search for the custom conversion name you just created…
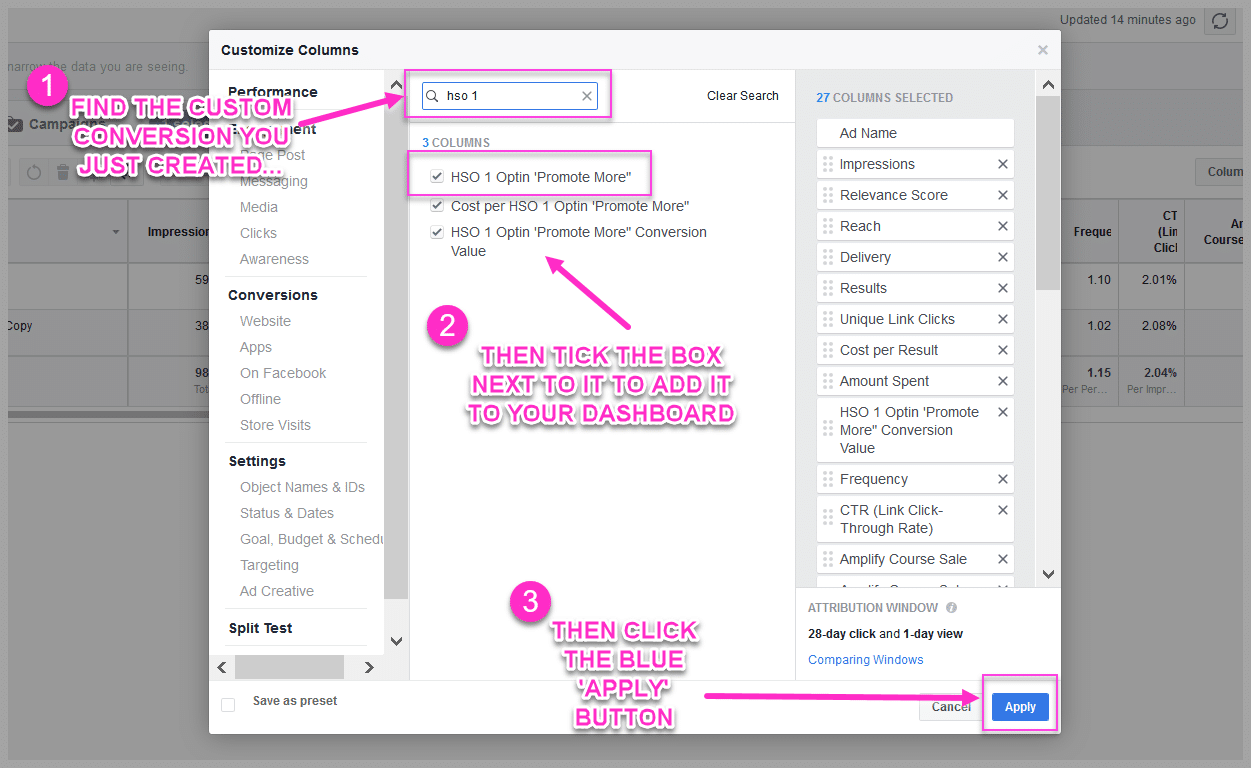
When you find it, simply tick the box next to it, to add it to your dashboard
Then click the blue ‘apply’ button to add it
Easy right?
You can add whatever you like here:
- Cost per optin
- Value per optin
- Etc
Simply search for the optin, and then click the box to add it across…
If you want to see this information again?
Simply click that ‘save as preset’ button
Give it a name, and then select that column option, each time you want to use it…
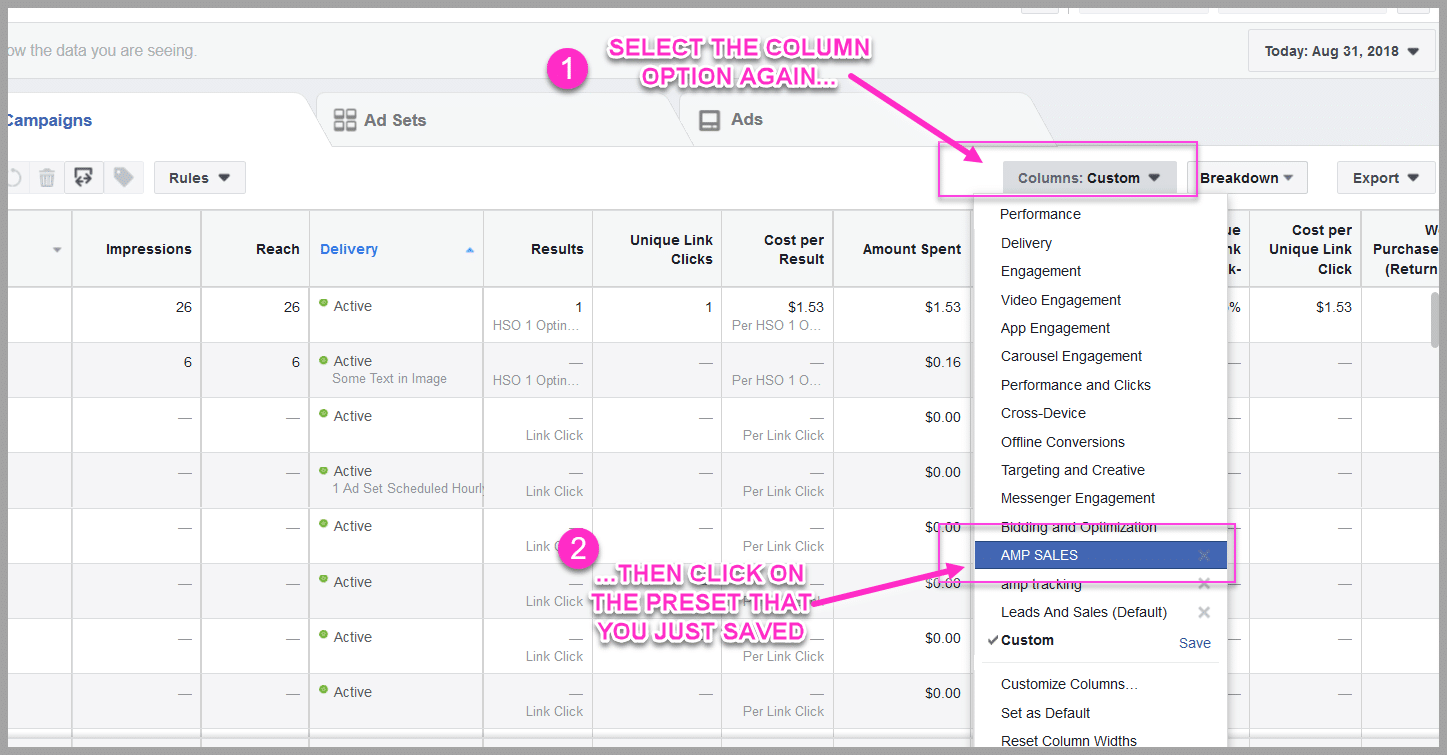
This will give you a daily update on how your ad is performing…
If you want to?
You can even set up a custom conversion when someone purchases from you
(Its the exact same process)
Simply:
- Make sure you have a page that customers go to after they purchase
- Set up tracking on that page
- Create a custom conversion for that sale, and add the value of that sale
That’s how we got this report…
Easy right?
To Do Now:
That’s your ad tracking all set up
Its important to do this BEFORE you start running your ads
(This way you’ll be able to measure the exact costs and see their performance)
Not only will it help you sleep easier at night?
But now you’ll also be able to improve your ad, and measure changes in its performance
This will then help you to lower costs, improve CTR and more
By now you’re probably excited to get started
Its almost time to start running those new adverts to your content
But to run those adverts?
You can’t just show them to anyone and hope they’ll convert
(Unless your advert is simply amazing)
When it comes to running and testing ads?
You need to be strategic with who you target, and why…
![]()
|
|
|---|---|
|
|
|
|
|
|